Welcome to Twigsee
You have just set up a nursery and created a manager account. Now it’s time to upload your data into the system. But what should you upload first?
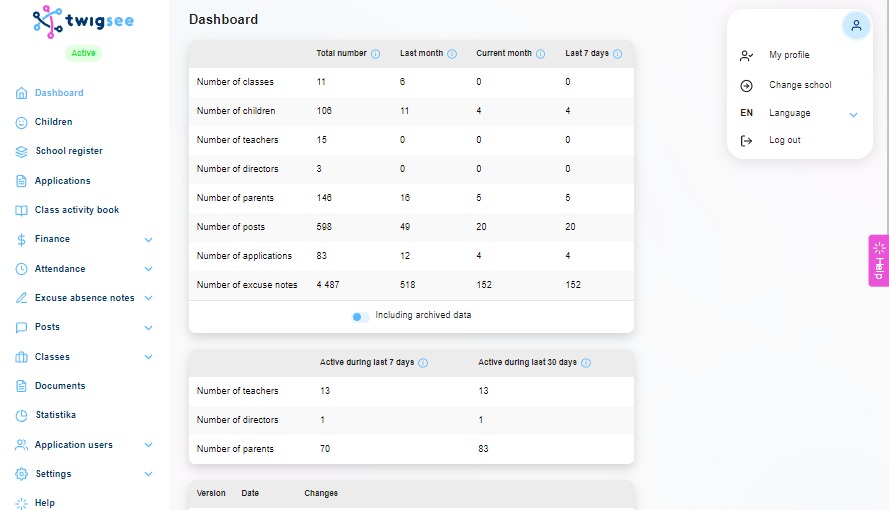
To help you find your way around this, you will find the guide that appears right after you log in on the main page (Dashboard) in the top bar. You’ll find information about your account and recommended steps to help you navigate the system as easily as possible – and, most importantly, to get it up and running quickly. We therefore recommend that you follow the points given. Every point is 11%. Click on See more to be guided further. Once you have uploaded the necessary data, the bar will turn green. Once it turns green it disappears.

For those of you who like to do a little reading before you start exploring the new system, we have summarised all the important information.
Starting from scratch: What exactly is Twigsee?
Twigsee (translated as “see your twig”) is a client data management (CRM) administration program and a communication application all in one. You can read all about our origin in one of our interviews with founder Vanda Seidel.
The Twigsee system is divided into 2 platforms:
- PC administration for managing the nursery
- Mobile application for communication with parents and attendance records
All information about the mobile application can be found in the short video presentation. You can also watch the video “Instructions for parents“. The key is simplicity and real-time work.
What will you find in the PC administration?
The PC administration emphasises simplicity and it’s user-friendly. You can move through the sections using the left-hand bar tab. Some sections are divided into further categories. On the right-hand side you will always find the basic settings and the Help icon. In other sections, there are action buttons next to the icon, but more on that later.
First Steps
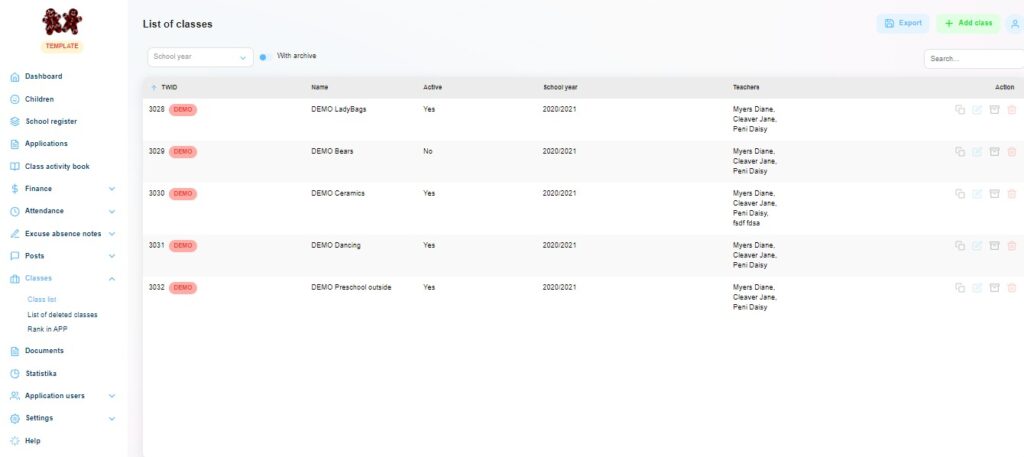
1. First, we recommend setting up the classes.
Classes are the basic element to which most of the other functions are linked, including recording attendance or linking children’s accounts to the mobile app. It is actually a group that you can manage together. In addition to the usual school classes, a class can be, for example, clubs, camps, teams, etc.
You set up the classes in the Classes section and the Class List category via the green action button in the upper right corner Add class. For more detailed information, please refer to this guide.
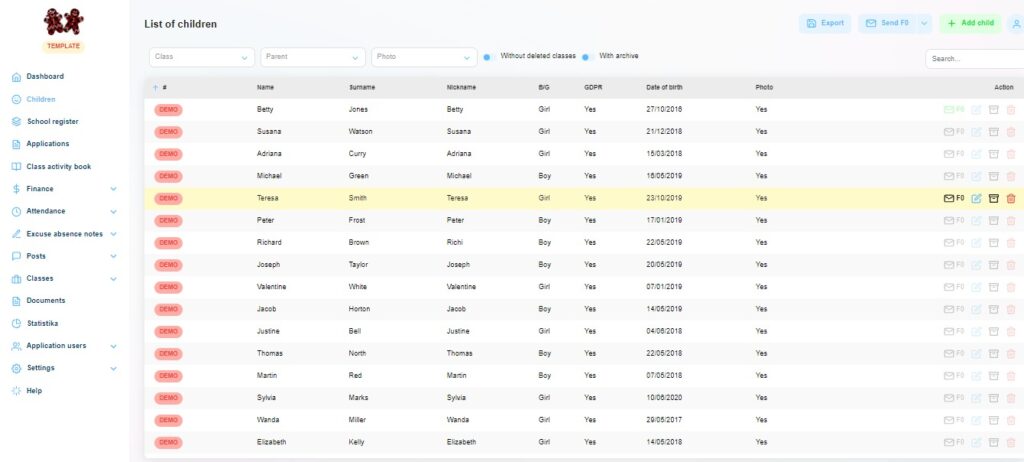
2. Once you have created your classes, you can add children to the list.
You can include nursery staff if you need to record their attendance, for example. You can add them in the Children section or the Matrices section. The logic for adding a subject is the same throughout the administration. So you can also insert a child here via the green button in the top right corner Add child. To add a child to the system you just need:
- the child’s name
- the child’s surname
- the classes the child will be attending
The other information that will be entered in the register, including the date of birth, will be filled in by the parents if you use the Register module. For new children we recommend using the automatic login.
3. Insert application user
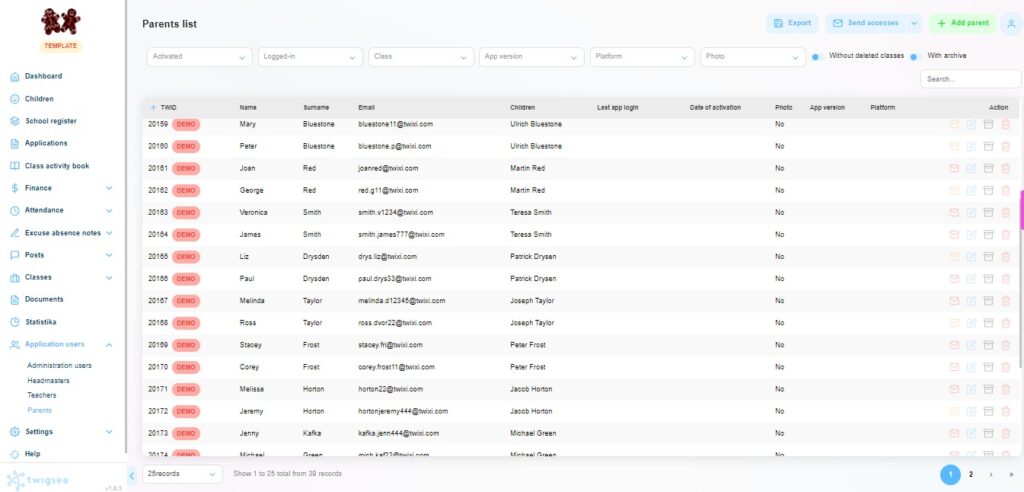
The mobile app users can be parents or nursery staff. They can be found in the Users section. Next, we need to select a category.
Parents are all recipients of information about children who are not employees of the nursery. They can be, for example, grandparents. It is up to you and of course the legal representatives of the children. There is no limit to the number of them.
Teachers and principals are the people who manage the classrooms and share or record information through the app in real time. But unlike teachers, principals automatically find all classes in the app. So there is no need to assign them.
For all users, the process of adding is the same. The Add button can be found in the top right corner. (Detailed instructions for inserting can be found here: parents; teachers; principals)
Attention: Each of these users must have a unique email address. Without having one, an account cannot be created.
In the Users section you will also find Administrators. These are the people who have access to the PC administration and all the information that is stored there. They can also delete or change the information, not only record it.
4. Come and create a post
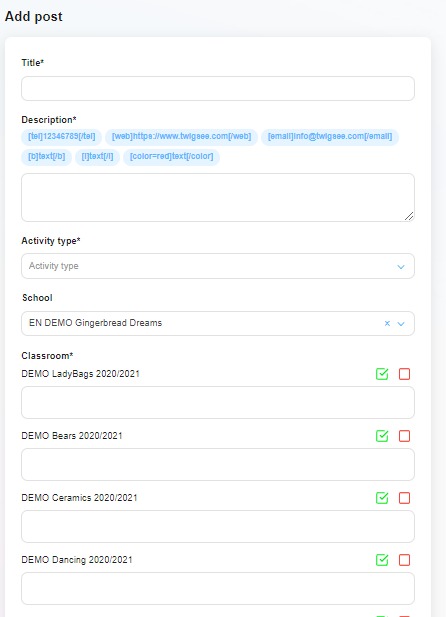
A post is information that you would like to share. It can take the form of a simple message or a poll. There is an option to attach photos. Creating a post is very simple and it quickly communicates relevant information to parents about what is happening at school, their child’s progress, events or condition. For example, a post can be a notification to a parent that spare clothes need to be brought in. Alternatively, posts can be used to relay important information to teachers.
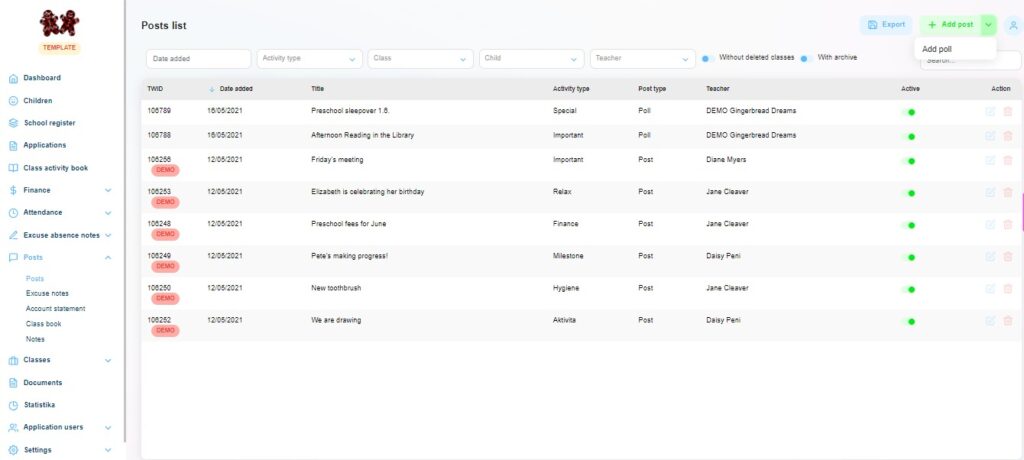
In the Administration, you can create a post by clicking on the Posts section and the Posts category. The same posting logic as for the subjects is maintained here as well. So just click on the Add Post button in the top right corner. Unlike the others, this button has an arrow next to it. If you click on it, you will see an option Add poll. If you get lost when adding a post, or want to learn some tips on how to use polls, for example, check out the Posts section in the Help tab.
TIP: Don’t know how to add a video to your post? Click here for full instructions.
5. Keep a record of attendance
With attendance records, you always have a perfect overview of how many children are in your class. In the case of playgroups, you can also record teacher attendance very easily for the purposes of reporting to the MoEYS. Other modules such as classroom management and meal calculation are linked to attendance.
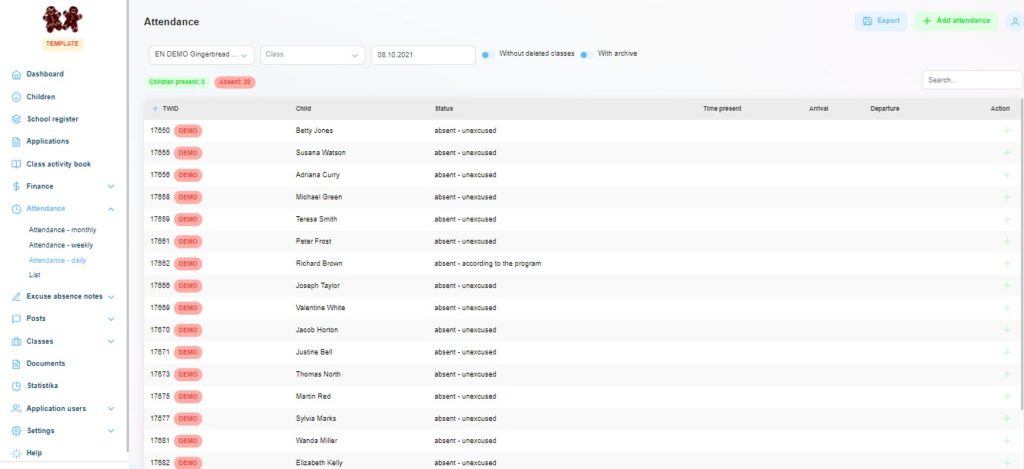
The easiest way to record attendance is via the mobile app. However, even in the PC administration it does not take long to log into it. Like everything else, you can add attendance via the Add Attendance button in the top right corner. However, this button can only be found in the Daily overview in the Attendance section.
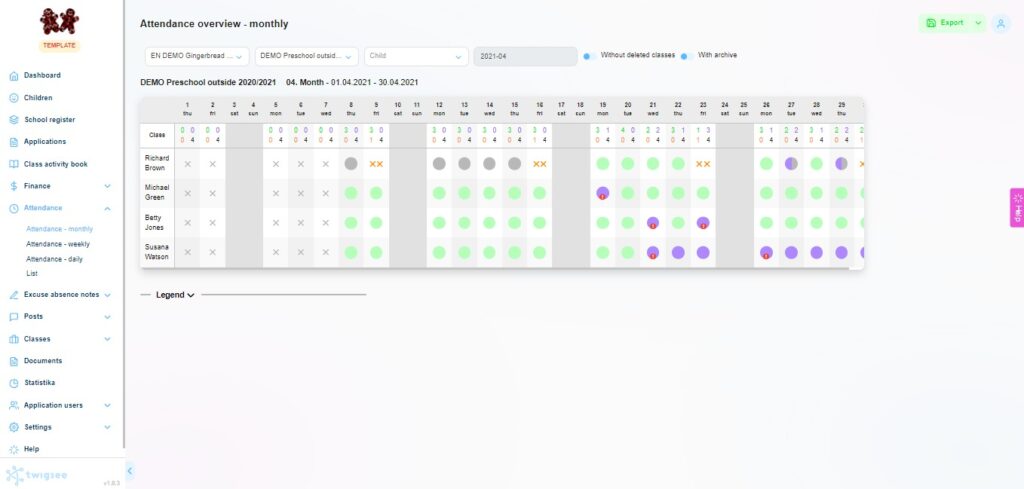
Once the attendance has been filled in, you can look at the monthly overview where you will see all the information. Below the summary table you will find a legend with explanations of the characters. Alternatively, you can also refer to the article “What do the different characters and colours on the attendance sheet mean?“.
6. Edit your contact information
In the Settings section you will find the Edit Nursery tab. Here you can find all the information about the branch. (If you serve more than one nursery, you will need to go through the editing process with each of them.) You should always check this information before inviting parents. Once you click on Edit Nursery, you will see a window with tabs called sheets. The first will be a Basic sheet with essential information. But please go through all 5 tabs thoroughly.
Contact details are written on the invitations, the logo on the nursery header and on the mobile app. We recommend adding information such as teacher contact information, lunch check-out policy, list of things parents should remember to bring, etc. Parents will see the description on the app.
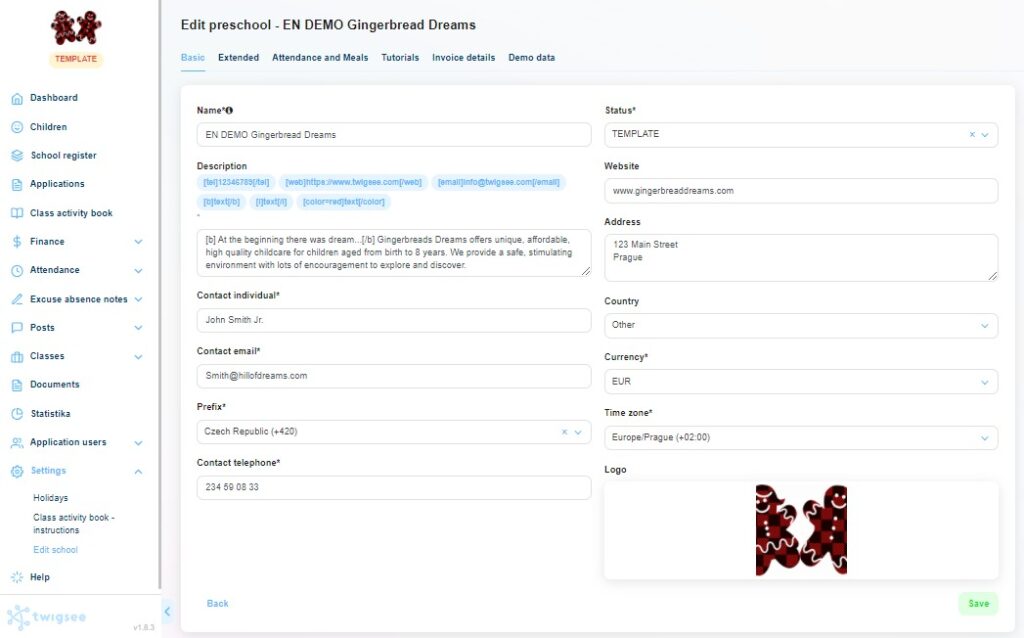
In the Extended setting, you can add the information for admissions. If you are a playgroup Additional information that needs to be kept about the facility. The Billing tab is used to enter or edit billing information and for setting up an address you want your invoice to be sent to. This way you will never have to forward it again.
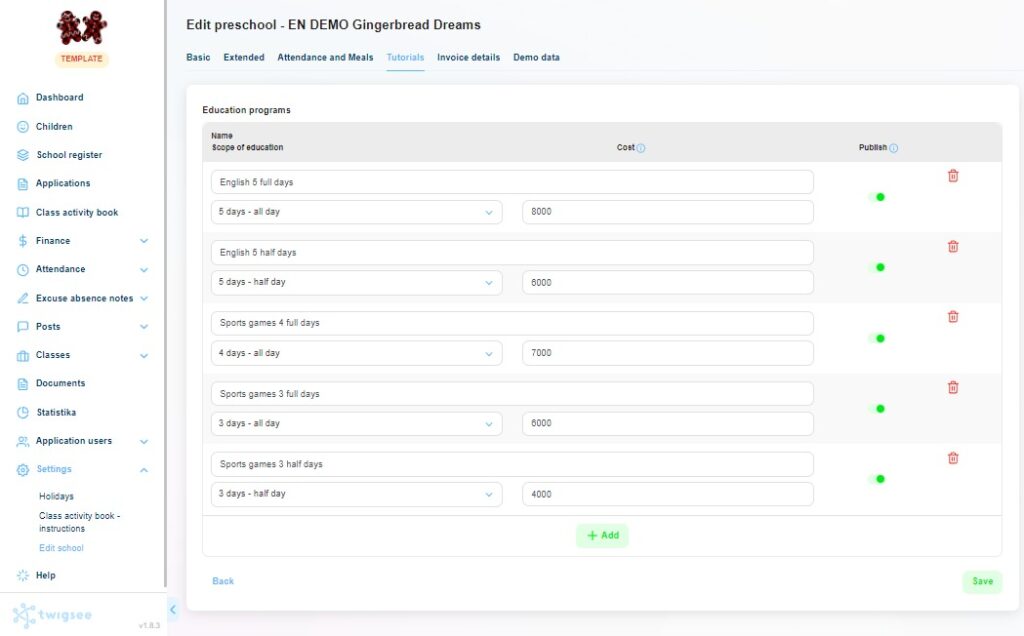
The Attendance and Meals and Training Programs sheets deserve more attention in this article. In the Tuition and Fees sheet, you will be able to set the price of tuition and regular absences. By program, we mean – prices and schedules for children to access the facilities. The program can also be a club or camp, provided that other children attend it. (At the moment, only 1 program can be registered for each child.)
There is also an early and late excuse tracking feature associated with the programs. If a program is not set up, the system takes each excuse as an early excuse. The name of the program (we recommend selecting a different name for each program), the number of days that attendance is expected for that program, and the cost is always listed. The price can be 0 CZK. For a detailed description of the program settings and how they are assigned to children, see the following articles.
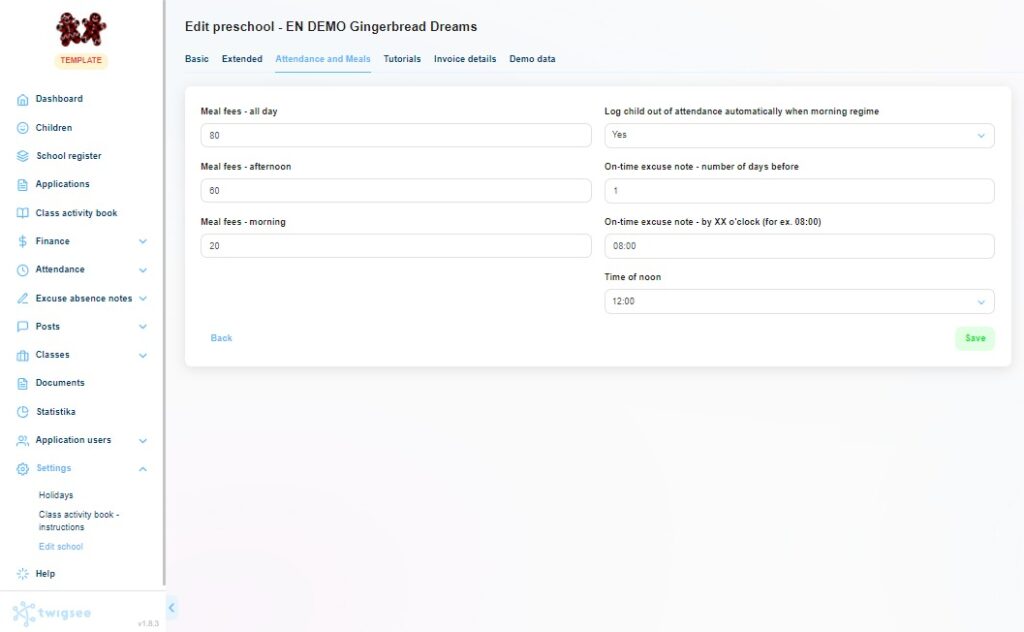
On the Attendance and Meals tab you can set the parameters for calculating the meal prescription. You can also set the time for noon, i.e. from when the afternoon attendance starts (this is what the parents’ excuses are based on, in addition to the price of meals). If you set up an automatic check-out for the morning attendance, the system will automatically check the child out at 10:00 pm. Last but not least, you can set up the monitoring of excuses sent after the deadline (so-called late excuses). Just a reminder. If parents have to excuse their child later that day, for example in the morning, enter 0 in the number of days in advance.
7. Everything is ready for the parents’ invitation
- You have set up the contact details.
- Teachers have tried out the basic functions of recording attendance and writing a post in the administration.
- You have looked at the differences and options for editing attendance in administration.
- You have set up all your accounts.
- Demo data deleted.
So go ahead, there is nothing stopping you from inviting parents and asking them to fill out a 5 minute form with additional information about the children.
How do we do that?
In 3 very easy steps:
- Send an email to the parents about switching to the Twigsee app. This needs to be written from your email so that parents are not surprised.
- Send parents invitations to the app.
- Send parents the forms.
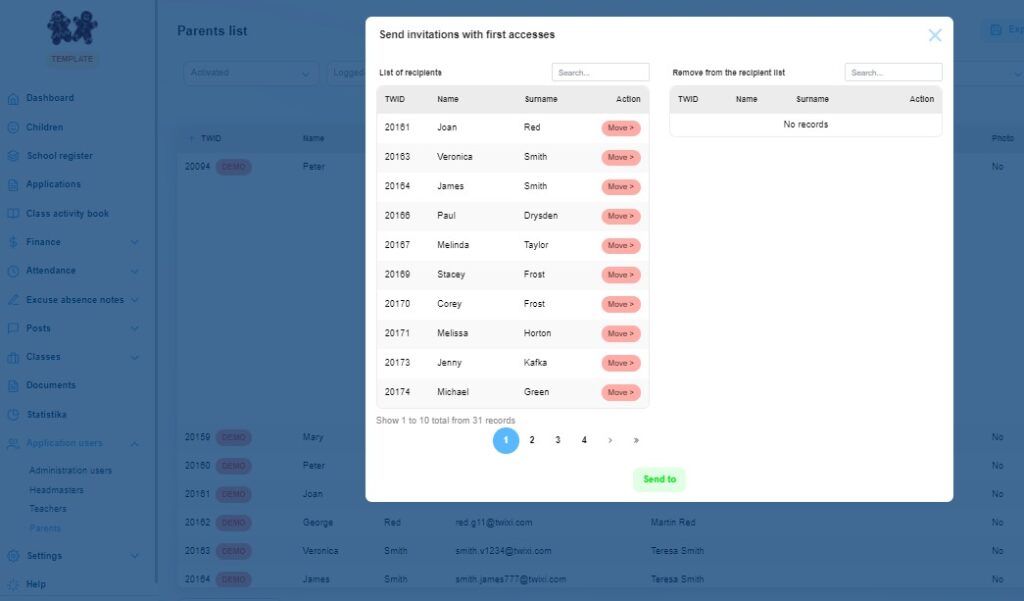
Send the invitations in the Users section and Parents category. In the top right corner next to the green button, there is another action button Send accessions. Click on it and select First accesses. In the table you will see a list of parents to whom the invitation will be sent to
If you would like to leave some parents out for now, just use the Move button to move them to the Exclude from recipient list column. Then click on Send and confirm. Once sent, all the envelope icons for the parents below will turn orange. For more information and an explanation of the different sending options, see the article “Bulk Inviting Parents to the App“.
You can also contact all users individually via the envelope icon at the end of the row with their name.
At the same time, or even before invitations are sent, you can send out forms to fill in the information you need for the registration. These forms are called F0 forms and are a combination of an application form (F1 form) and a questionnaire with additional information about the child that can be requested after the child has been admitted to the nursery (F2 form). This form goes out separately for each child, although some children may have the same parents.
The procedure is similar to sending invitations to parents. However, open the Children section and select the Send F0 action button here. You select First send and exclude those children you don’t want the form to go to. Then click on Submit and confirm. Once submitted, all the F0 icons, at the end of the line with the children’s names, will turn orange. You can also send this form individually. Just click on the F0 icon for that child. The form will be distributed to all parents that are paired to the child’s account.
Note: For children that you have not paired with a parent, (the no parent flag is lit), the email will be sent, but it will fall to our inbox because there is nowhere to send it to.

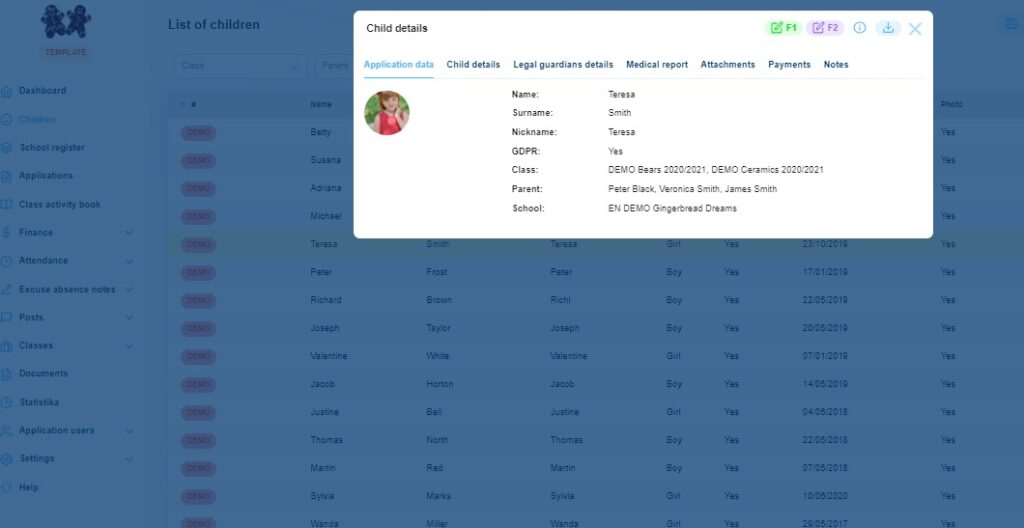
Once the parents have completed the forms, you can easily view the child’s information by clicking on the child’s name in the Children or Registry section. A pop-up window will appear with several sheets where you will have all the information from the forms summarized. All you have to fill in is the information in the little blue “i” icon in the top right corner of the pop-up. This is where you set additional information about the children, such as start dates, program, etc.
Congratulations!
You have successfully launched the communication app and attendance system.
Twigsee offers additional modules that you can run at your leisure as you need them. They have no impact on parents and the data obtained from using the mobile app will help you to navigate and the whole administration will be easier.
And don’t forget – you can always contact us at [email protected] if you need us.
You can direct any questions parents may have directly to us and we will provide a support contact for them at[email protected].
We hope that Twigsee will make you as happy as it makes us.
Have a great day
The Twigsee team