How to add a child to Twigsee administration?
Once a child has been admitted to the preschool, you need to create a profile for them in the Twigsee administration. You can fill in the child’s details using a short form, where you assign the child’s parents and the class to which they belong. The information can also be edited retrospectively.
WARNING: Classes must be created before adding children.
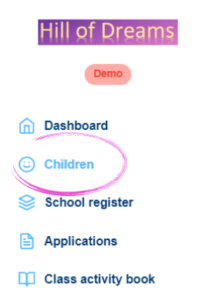
1. Location of the Children tab
In the main menu on the left side of the screen, select the second tab marked Children. Click to open the Children’s List window in the application.
2. Adding a child
To add a new child, use the green + Add Child button in the upper-right corner.
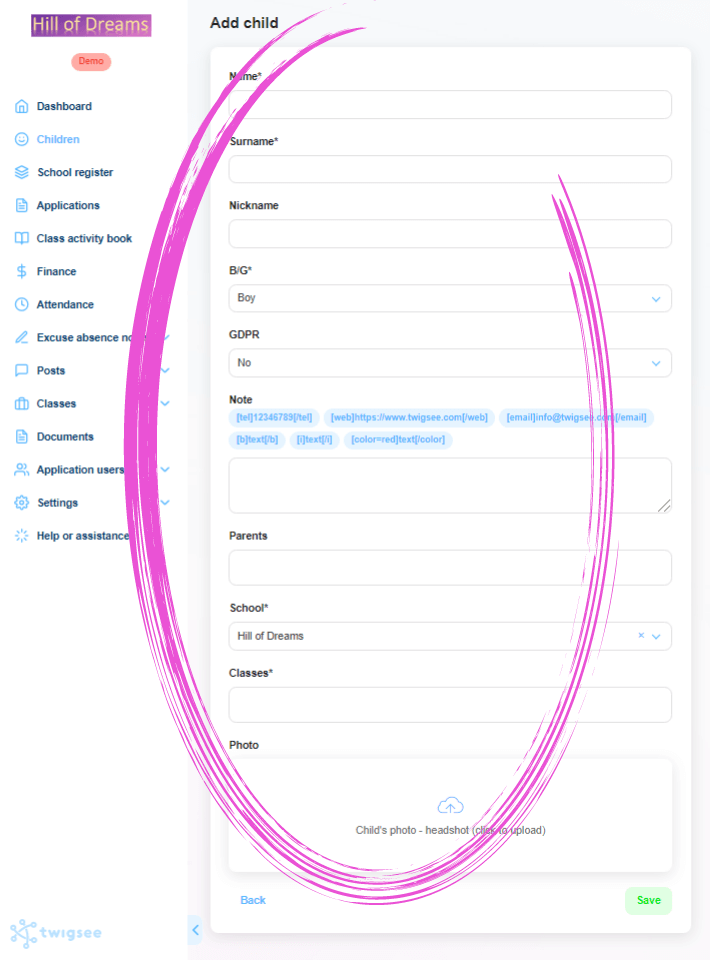
3. Completing your child’s details
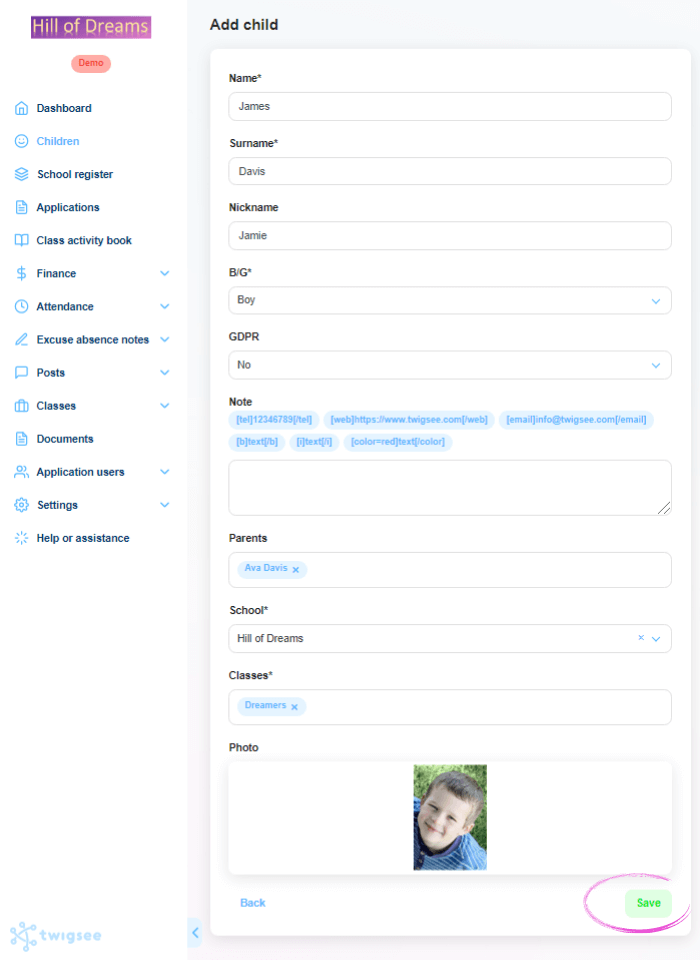
A window opens to enter the necessary information, including a photo and nickname. Fields marked with an asterisk are mandatory, and without completing them, the system will not allow you access.
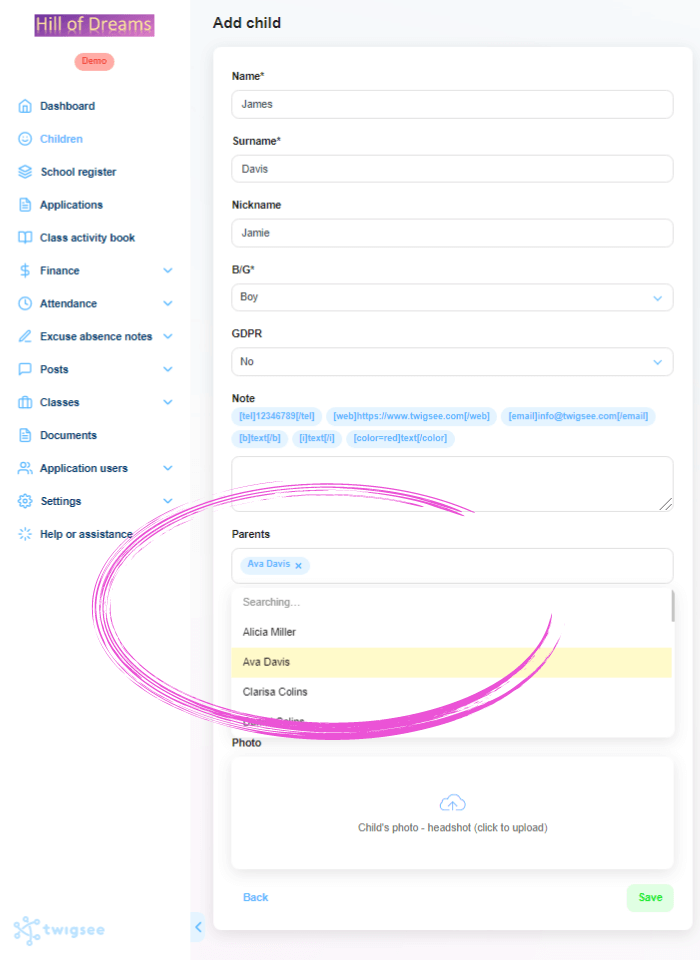
4. Assigning parents to a child
Clicking in the Parents box expands the menu of parents specified in the preschool application. To assign specific parents, click on their names in the menu.
TIP: Without assigned parents, the new child can be saved and the parents can be entered and assigned later. Not sure how to add parents?
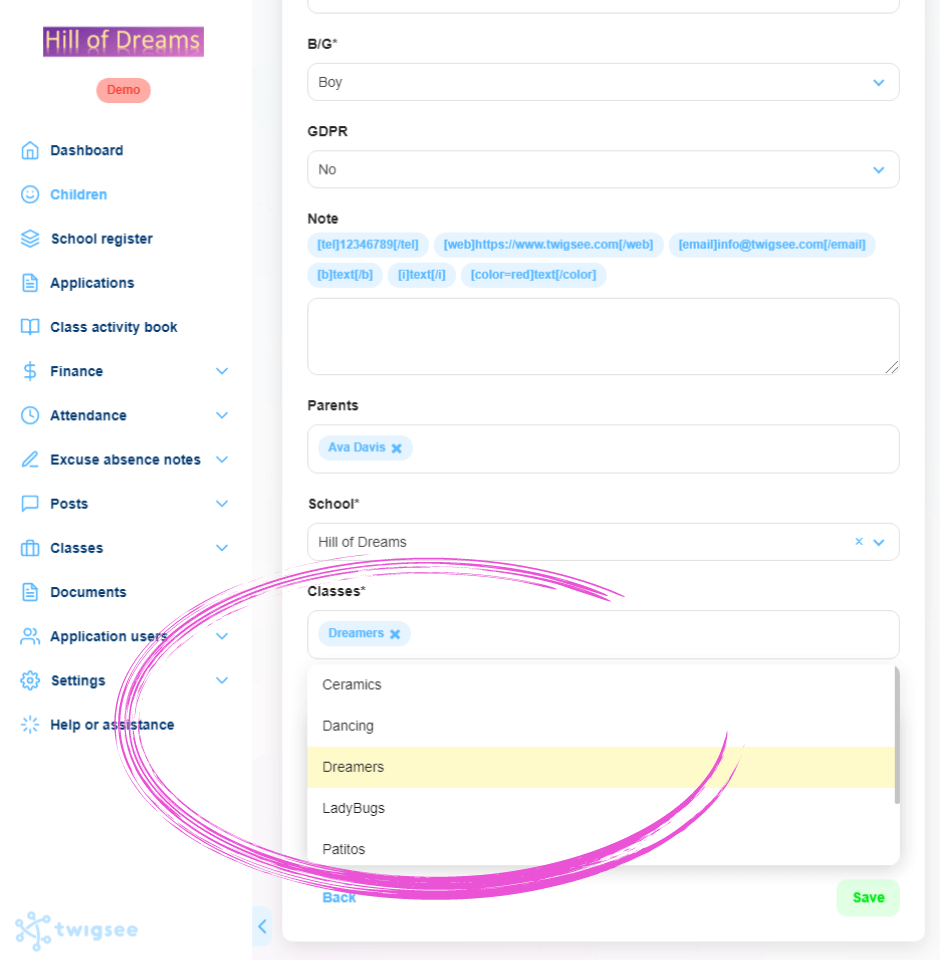
5. Placement of a child in classes
Clicking in the Classes box expands the class menu specified in the preschool application. To assign a specific class/classes to a new child profile, click the class names in the menu. The Classes field must be filled in to save the new child. Therefore, it is necessary to have classes entered before entering children.
6. Saving new child profile data
To save your child’s newly created profile information, use the green Save button in the lower-right corner.
7. Child’s profile is created
The child is added when the green Item created bar that appears at the top informs you of this.

